Testing email verification with Google Apps Script

Automated email verification is something that can help streamline testing by circumventing the need for manual intervention. In cases where you have control of the email provider and recipient, it is possible to use an API to interface with this email account. This post will address how to perform do this email verification with Google Apps Script.

Conceptual Overview

What we want to do is access a target Gmail account and perform CRUD operations on the emails. But how?

  1. Google Apps Script will provide us with a public customizable API proxy to perform those CRUD operations.
  2. Our client consumer will interact with the deployed Google Apps Script API proxy, executing the correct HTTP method as well as the request parameters necessary to operate on the Gmail account. A response should be returned so that the client can identify the result of the operation.

Setup

  • Create a new Gmail account that will be used with automation.

    Create Google Account
    Create Google Account

Design

  • Navigate to Google Apps Script and develop your application. For our purpose, we will simply need 1 post method that will take a JSON body in the parameters:
    • emailCount — How many of the most recent emails to check
    • subjectPattern — Regex pattern that the email subject should match against
    • dateAfter — Dates after this will be included as emails to check (ISO 8601)
    • timeout — How long in seconds should we wait to check the emails

The editor will provide you with auto-completion. See this page for the complete Apps Script Reference. In addition, you can enable more API’s using Resources > Advanced Google Services.

Keep in mind, this is YOUR API proxy around the facilities that Gmail provides, you can perform way more capabilities than what is seen here.

/**
/**
 * Process unread emails and return latest match (stringified json)
 * according to subject Regex after marking it as unread
 * Waits n Seconds until a non-empty response is returned
 *
 * {
 * emailCount = Integer
 * subjectPattern = "String.*That_is_regex.*"
 * dateAfter = Date.toISOString()
 * timeout = Integer (seconds)
 * }
 */
function doPost(e) {
  var json = JSON.parse(e.postData.contents);
  
  var emailCount = json.emailCount;
  var subjectPattern = json.subjectPattern;
  var dateAfter = json.dateAfter;
  var timeoutMs = json.timeout * 1000;
  
  var start = Date.now();
  var waitTime = 0;
  var responseOutput = {};
  
  while(Object.getOwnPropertyNames(responseOutput).length == 0 && waitTime <= timeoutMs ) {
    responseOutput = controller(emailCount, subjectPattern, dateAfter);
    waitTime = Date.now() - start;
  }
  
  return ContentService.createTextOutput(JSON.stringify(responseOutput)); 
}


function controller(emailCount, subjectPattern, dateAfter) {  
  var responseOutput = {};
  
  for(var i = 0; i < emailCount; i++) { // Get the msg in the first thread of your inbox var message = GmailApp.getInboxThreads(i, i + 1)[0].getMessages()[0]; var msgSubject = message.getSubject(); var msgDate = message.getDate(); // Only check messages after specified Date & Subject match if(msgDate.toISOString() >= dateAfter) {
      if(msgSubject.search(subjectPattern) > -1) {
        if(message.isUnread()){
          GmailApp.markMessageRead(message);
          
          responseOutput = getEmailAsJson(message);
          break;
        }
      }
    }
  }
  
  return responseOutput;  
}


function getEmailAsJson(message) {
  var response = {};
  
  response["id"] = message.getId();
  response["date"] = message.getDate();
  response["from"] = message.getFrom();
  response["to"] = message.getTo();
  response["isRead"] = !message.isUnread();
  response["subject"] = message.getSubject();
  response["body"] = message.getBody();
  response["plainBody"] = message.getPlainBody()
  
  return response;
} 

When you are done, save your script.

Publish

  • Deploy your script as a web app to act as a Proxy. You will need:
    • Project version to deploy into (with commit comment)
    • Who this app will execute as — Basic security
    • Who has access to the app — More security

      Deploy Script as Web App
      Deploy Script as Web App

After continuing, your app should be deployed to a public Google Apps Script URL, which you will access as your API Proxy. Copy the endpoint URL you will use it next.

Run

  • Test it out! For this, I’ve accessed the web app endpoint with the following json body to find the 1st latest email after 05/20/2019 7:14:19 UTC
{
	"emailCount": 1,
	"subjectPattern": ".*",
	"dateAfter": "2019-05-20T07:14:19.194Z",
	"timeout": 5
}

As expected, the latest email was returned in a JSON request that also includes some metadata. It also marked the email as read, so subsequent requests will not reprocess it — all as specified in our script. Super!
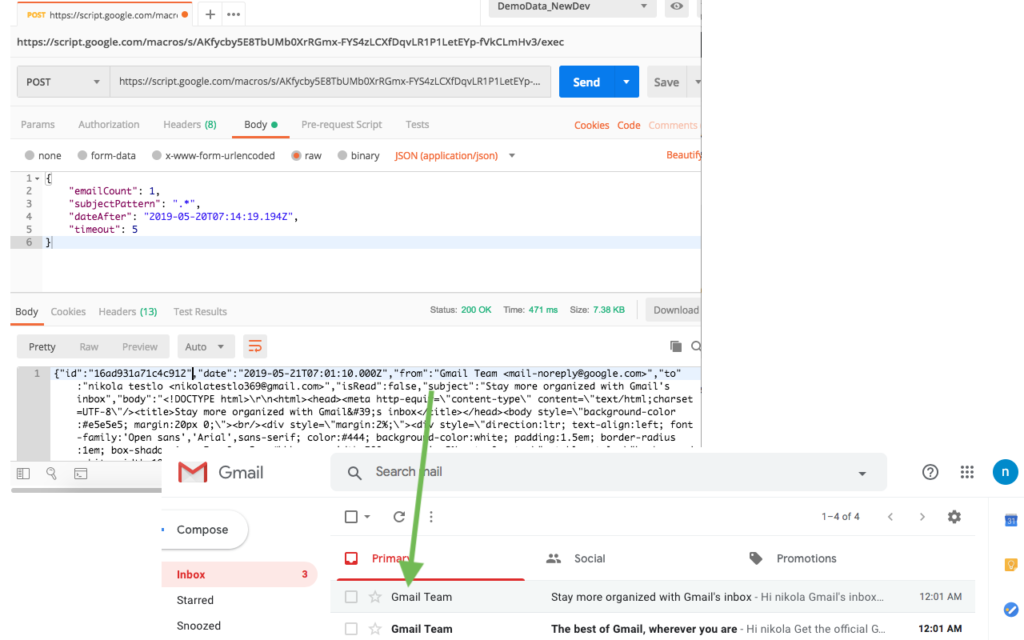
Postman API post request to Google App Script

Integrate

  • With our client app, we may have something like this which works on our Google Apps Script
package com.olandre.test.email;

import io.restassured.RestAssured;
import io.restassured.response.Response;
import org.json.simple.JSONObject;
import org.openqa.selenium.*;

import java.util.HashMap;
import java.util.Map;
import java.util.regex.Matcher;
import java.util.regex.Pattern;

public class Email
{

    public static final String servicedGmailFullCapabilitiesEmail = "emailuser1@gmail.com"
    public static final String servicedGmailFullCapabilitiesService = "https://script.google.com/macros/s/FAKEGOOGLEAPPSSCRIPTURL/exec";

    public Email()
    {
    }

    public static String getCurrentMethodName()
    {
        return Thread.currentThread().getStackTrace()[2].getClassName() + "." + Thread.currentThread().getStackTrace()[2].getMethodName();
    }

    public String processNewMemberSignupEmail(String email, Integer timeout, String emailSearchPastDate, String firstName,
        String lastName) throws Exception{
        final String NEW_SIGNUP_SUBJECT = String.format( "Welcome %s %s!", firstName, lastName);
        final String SIGNUP_CONTINUE_LINK_REGEX = ".*=\"(http.*/signup/.*)\" target.*";
        final String PLAINTEXT_SIGNUP_TEXT = String.format(
            ".*(Hi, %s! Welcome Aboard .*To sign up, you'll need to create a password.*html.*/register/).*", firstName);

        Request request = new Request();
        Response response = request.checkEmail( email, NEW_SIGNUP_SUBJECT, emailSearchPastDate, timeout );
        return request.findEmailClickthroughLink(
            response, SIGNUP_CONTINUE_LINK_REGEX, PLAINTEXT_SIGNUP_TEXT );
    }

    /**
     * When we decide to add headers, and other metadata
     * to the request, outsource and turn into a generated builder Class
     */
    public class Request {

        private Map<String, String> emails;

        Request() {
            emails = new HashMap<>(  );
            emails.put(servicedGmailFullCapabilitiesEmail, servicedGmailFullCapabilitiesService);
        }

        public Response post(String url, JSONObject body) {
            Response preRedirectResponse = RestAssured.given()
                                                      .redirects().follow( false )
                                                      .body( body.toString() )
                                                      .when().post( url );

            String location = preRedirectResponse.getHeader( "Location" );

            return RestAssured.given()
                              .cookies(preRedirectResponse.getCookies())
                              .when().get(location)
                              .thenReturn();
        }

        /**
         * {
         *   emailCount = Integer
         *   subjectPattern = "String.*That_is_regex.*"
         *   dateAfter = (ISO 8601 Date"2018-05-10T17:24:58.000Z")
         *   timeout = Integer (seconds)
         * }
         * @param
         * @return Response
         */
        public Response checkEmail(String email, String subjectPattern, String emailSearchPastDate, Integer timeout) throws Exception {
            String serviceURL = emails.get( email );

            HashMap<String, Object> model = new HashMap<>(  );
            model.put( "emailCount", 10 );
            model.put( "subjectPattern", subjectPattern );
            model.put( "dateAfter", emailSearchPastDate );
            model.put( "timeout", timeout * 1000);

            JSONObject json = new JSONObject(model);

            Response response = null;
            if (serviceURL != null) {
                response = post( serviceURL, json );
                if(response.getBody().asString().equals( "{}" )) {
                    LOGGER.warn( "[ FAIL ] Did not find response data using request: " +
                                       json .toJSONString(), getCurrentMethodName());
                }
            } else {
                LOGGER.error( " [ FAIL ] Couldn't find the service url for account " +
                                   email, getCurrentMethodName() );
            }
            return response;
        }

        public String findEmailClickthroughLink(Response response, String htmlPatternToParse, String plaintextPatternToParse) throws Exception {
            String body = response.getBody().asString();
            findTextInEmail(body, plaintextPatternToParse, "PLAINTEXT");
            return findTextInEmail( body, htmlPatternToParse, "HTML" );
        }

        private String findTextInEmail(String sourceText, String regex, String emailType ) throws Exception{
            String targetText = "";

            Pattern pattern =  Pattern.compile( regex );
            Matcher matcher = pattern.matcher( sourceText.replace("\\", "") );
            if(matcher.matches()) {
                targetText = matcher.group(1)
                                    .replace("=", "=");
                LOGGER.info( " [ PASS ] Found a link from " + emailType + " email " +
                                   targetText, getCurrentMethodName() );
            }
            return targetText;
        }
    }
}

In the future you may modify your Google Apps Script by publishing a new version (or overwriting the existing one). Depending on the change, this modified “contract” of your proxy may also need to be updated correspondingly with the client application. With this in mind, you now have the power to use Google Apps Script to verify emails.


NOTE: In case you need extra configuration around security, you can take the more configurable approach by using the Gmail API directly.

Testing using Postman

Postman is a very handy tool for sending requests (which are mock-able) during development and while testing. This “post” will address some common ways Postman can be utilized in a testing effort.

1. Manual Testing

When you need to execute a specific request to a server postman allows you to send that directly. NOTE: If you are jumping back and forward from the browser and Postman (very common), you will want to sync your browser cookies with Postman via the Interceptor to share access to the session — this is a big time saver.

2. Automated BE Smoke Testing

For very common user scenarios, more often than not, you can automateĀ  testing by sending critical requests necessary to mimic a users experience. For example, a user logs in, searches for a product, adds 2 then removes 1, submits their order, confirm their order history. Due to the stable nature of backend tests, this type of testing is recommended to have robust and as the core for Functional testing. Using Postman is faster than creating a custom test framework and it is intuitive to share the Postman collection tests with other members of your team (no documentation necessary šŸ˜‰ ).

3. Performance Testing

If you have built out multiple user workflows in your Postman collection(s), you can utilize them by creating parameterized iterations with your CSV (more on that below). In order to see system thresholds, you can scale up the iterations (delays), or even run multiple collections simultaneously while monitoring your system. Admittedly, there are better tools to suit this purpose.

4. Bootstrapping

Very often there is a need to create data necessary for other services to work properly. Running a collection will allow all the requests to fire in sequence to perform the procedure you need. Often this is used for setting up a system or creating dummy data.

Making the most out of it

In order to fully maximize the effectiveness of Postman, be sure to take advantage of Pre-request script conditions, as well as the post-request Tests. With these you can manipulate variables stored between requests, as well as make assertions on the state of the request. Postman uses Javascript to run.

Next, there may be a set of data you would like to parameterize your requests with — this is done by binding that data to a variable ( {{variable}} ).

Taking variable binding another step further, you can pass in a CSV data set (a “table” with headers of variable names) to allow auto decoupling of the postman collection with the data it will use. This method of using CSV data set, will allow your collection to run N number of times (iterations) for the number of rows of data you have in your data set. When running (Postman Runner), you can specify a delay between iterations if necessary.

Finally, you can execute your postman collection(s) in your CI/CD system by way of Node.js and the Newman package.

Conclusion

Although postman is not as flexible as codifying your own solution for testing (not possible to run BE + FE hybrid tests, 3rd party library integration not supported, varying subscription plan restrictions, etc.) it certainly is a staple in any developing, and testing initiative.

The argument for Behavior-Driven Development (BDD)

In most development efforts, the features and capabilities defined will come from the stakeholder(s) who are sponsoring the development — if not yourself. The stakeholders will interact with someone technically proficient, who will be the decider of what gets scheduled, prioritized, designed, and implemented. Often this person takes the role of a Product Owner/Manager.Ā 

Since one of the main focuses in a Product Owner’s day-to-day is understanding requirements and making sure features are delivered as expected — bug free — they will often need a window to judge if this is the case. One way this can be done is writing up a Specification document for a feature and working with a test team to ensure a Test Plan with appropriate Test Cases are created. At that point the Product Owner can decide if sufficient cases and coverage have been accounted for.

This approach is nice if resources have been dedicated to ensuring each test case gets run and can report on the statuses, both while developing a new feature, and during regression. In theory it is nice but not easy to keep in lockstep.

Behavior-Driven Development (BDD) to the rescue!

An alternative approach that also allows Product Owners to understand the extent of feature developed, and their effort to synchronize with a test team is to utilize BDD (A form of TDD that focuses on UAT (User acceptance testing)). In this context, User StoriesĀ  are created by the Product Owner by way of working with stakeholders and put into a backlog of stories. Each, scenario describes a specific thing that a user would do. These would be descriptive and accurate. For example in a Auction Website platform you may have a scenario:

As an existing member to the U-Sell-It Auction Site
when I bid on a product that already has bids
and my bid is lower than prior bids,
then a message is displayed that my bid amount is too low

As you can see, this is very clear to a Product Owner, and nearly anyone who is looking at the scenario! Also, when products features / capabilities are framed in this way, it helps to identify potential gaps.

How will test use this?

In a testing effort, many BDD frameworks can be used such as Cucumber, and JBehave. At first, adding another DSL to a project may seem like overhead — especially if testing is performed by a team with “test” expertise — and that is a common complaint among many would-be-adopters of using a BDD framework. Though, the value gained from using it outweighs the value of not…

Benefits:

  • “Transparency” in the tests created. Tests can be shared with anyone and are highly understandable (it is still possible to map the DSL to badly designed & inaccurate code…)
  • Logs. Much more readable and can be easy to identify the step of failure.
  • Separation of concerns. Anyone can create new tests, edit existing ones at a high level.
  • May help drive better design decisions when creating the code used by the DSL (making generic & more reusable).

Drawbacks:

  • BDD framework needs to be learned.
  • Custom code may be required to interact with the DSL (previously available out-of-the-box when used without the framework).
  • Another dependency.
  • New layer to the existing test project + more code.

For these reasons among others, a BDD framework can be a very effective component to add in your development life-cycle.

Setting up React Jest and Enzyme

Jest is a popular JS framework for testing React js applications. By itself, it may need additional functionality to test React capabilities. Enzyme is a tool used to facilitate component testing.

In this quick overview, we will setup a React 16 CRA application with Jest & Enzyme using NPM.

Assuming we have our application created from

npx create-react-app my-app

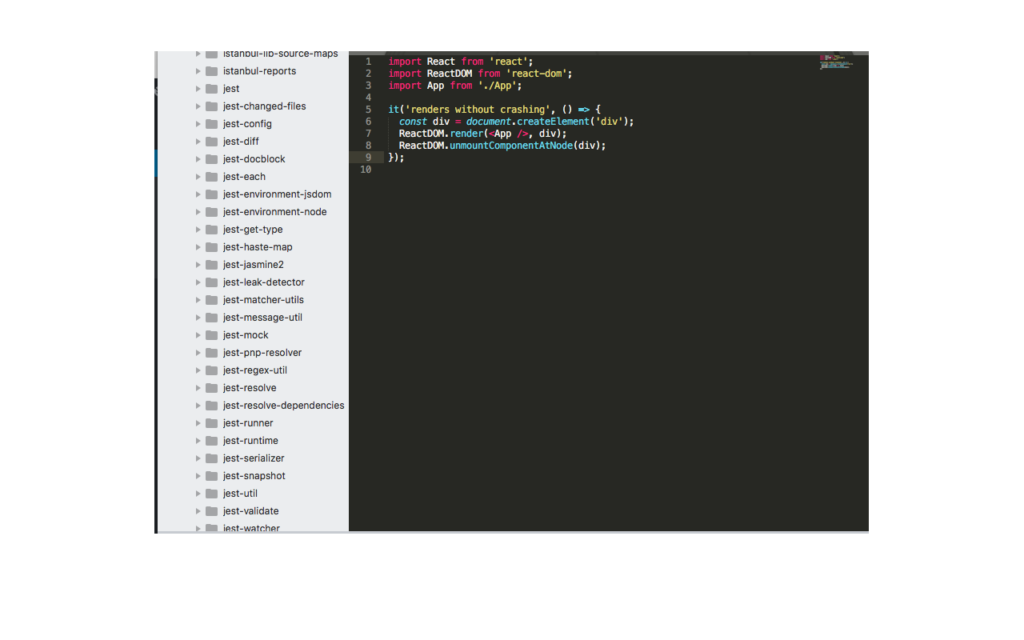
Hop into our app directory “my-app” and notice the “node_modules” folder. By itself, there are many existing capabilities that our provided out of the box, one of which being jest

Node_modules containing jest


So according to the Jest documentation for getting started, we can specify a “test” command for NPM to run jest. By default test will look for in a few placesĀ  one of them being the existing “App.test.js” file created from CRA. Lets edit it with a pure Jest test and run “npm test”.

package.json

{
  "name": "test-app",
  "version": "0.1.0",
  "private": true,
  "dependencies": {
    "@material-ui/core": "^3.8.3",
    "react": "^16.7.0",
    "react-dom": "^16.7.0",
    "react-router-dom": "^4.3.1",
    "react-scripts": "2.1.3"
  },
  "scripts": {
    "start": "react-scripts start",
    "build": "react-scripts build",
    "test": "jest",
    "eject": "react-scripts eject"
  },
  "eslintConfig": {
    "extends": "react-app"
  },
  "babel"
  "browserslist": [
    ">0.2%",
    "not dead",
    "not ie <= 11",
    "not op_mini all"
  ]
}

App.test.js

import React from 'react';

test('renders without crashing', () => {
  expect(1).toBe(1);
});

Running “npm test” we get the error

({"Object.<anonymous>":function(module,exports,require,__dirname,__filename,global,jest){import React from 'react';
^^^^^

SyntaxError: Unexpected identifier

Based on the error, (first line of our test file) it looks like the compiler is complaining about the React and ES6 syntax. Reading more in Jest, getting started, it states that we have should also specify a .babelrc file in order to use ES6 and react features inĀ  Jest.Ā  Lets go ahead and add that file in the CRA root.

.babelrc

{
"presets": ["@babel/env", "@babel/react"]
}

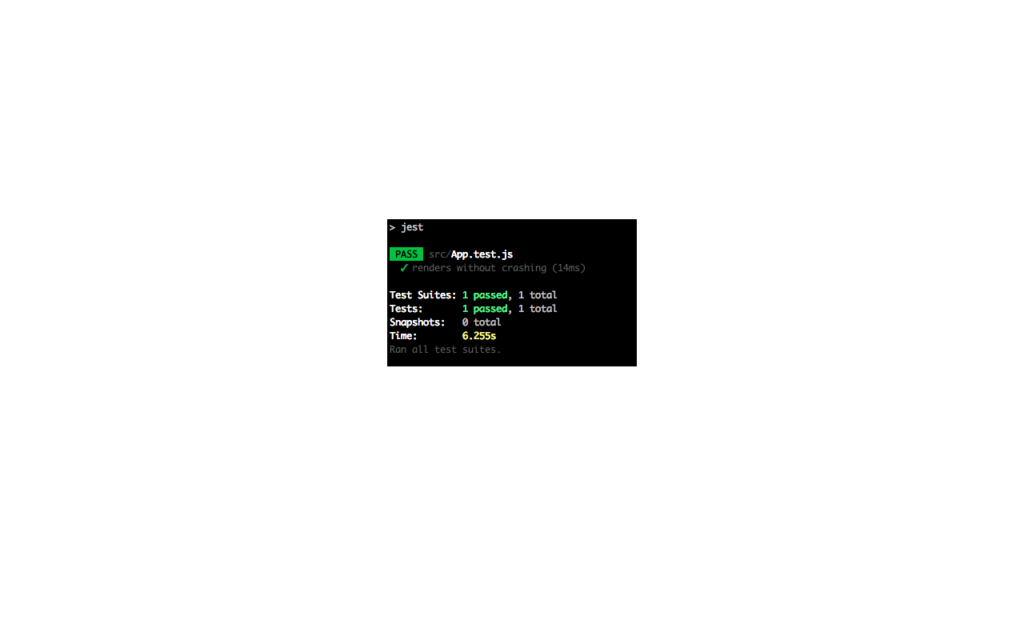
Now if we rerun the test again “npm test” we should see a pass. Great!

Passing Jest test

The test we have at the moment does not test anything specific to React, i.e. component rendering. To get this working we want to use Enzyme — It is not provided from CRA. Here’s the guide.

$ npm install --save-dev enzyme enzyme-adapter-react-16

We also need to add a setup file before using Enzymes features. The following helper file is added in the CRA root folder

enzyme.js

// setup file
import Enzyme, { configure, shallow, mount, render } from 'enzyme';
import Adapter from 'enzyme-adapter-react-16';

configure({ adapter: new Adapter() });
export { shallow, mount, render };
export default Enzyme;

Back in our App.test.js we can edit the test to check if our js component will render.

import React from 'react';
import App from './App';
import { shallow } from './enzyme';

test('renders without crashing', () => {
	const app = shallow(<App/>);
	expect(app.containsAnyMatchingElements([<a>
        Learn React
      </a>
    ])
  ).toBe(true);
});

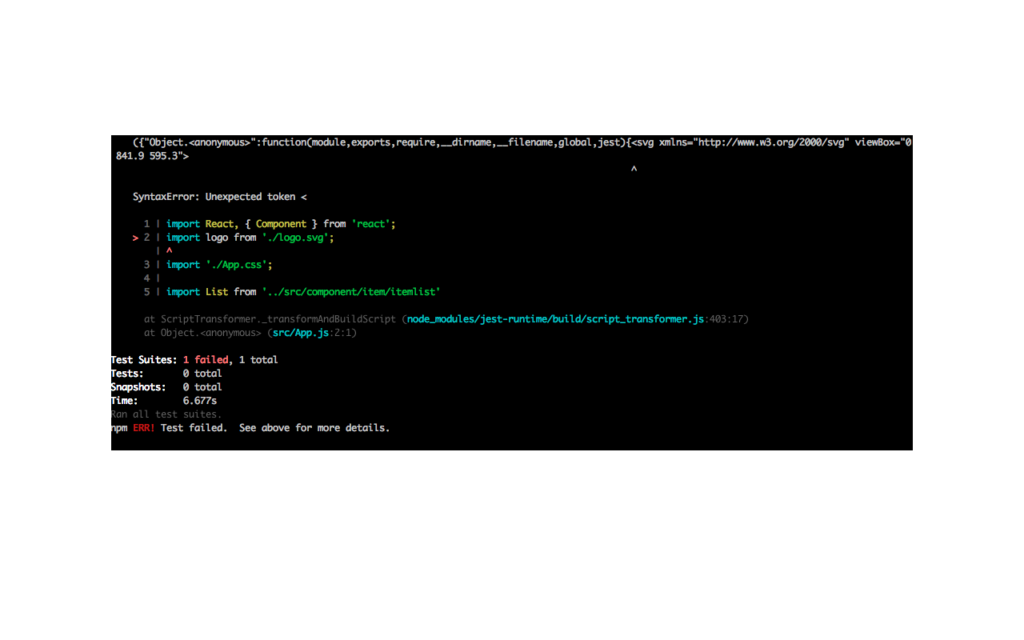
Here’s what we see.

Jest encountered an unexpected token

The error is from an import inside our test component “App.js” stating ” Jest encountered an unexpected token”. From the output, it looks like the svg file is being parsed incorrectly. This error has been noted elsewhere.

We start by adding the assetTransformer.js file in the root

assetTransformer.js

const path = require('path');

module.exports = {
  process(src, filename, config, options) {
    return 'module.exports = ' + JSON.stringify(path.basename(filename)) + ';';
  },
};

And allow Jest to perform this transformation on assets during module mapping. This is done by adding an attribute in the “jest” property of package.json

{
  "name": "test-app",
  "version": "0.1.0",
  "private": true,
  "dependencies": {
    "@material-ui/core": "^3.8.3",
    "react": "^16.7.0",
    "react-dom": "^16.7.0",
    "react-router-dom": "^4.3.1",
    "react-scripts": "2.1.3"
  },
  "scripts": {
    "start": "react-scripts start",
    "build": "react-scripts build",
    "test": "jest",
    "eject": "react-scripts eject"
  },
  "eslintConfig": {
    "extends": "react-app"
  },
  "browserslist": [
    ">0.2%",
    "not dead",
    "not ie <= 11",
    "not op_mini all"
  ],
  "jest": { 
    "moduleNameMapper": { 
      "\\.(jpg|jpeg|png|gif|eot|otf|webp|svg|ttf|woff|woff2|mp4|webm|wav|mp3|m4a|aac|oga)$": "<rootDir>/assetTransformer.js", 
      "\\.(css|less)$": "<rootDir>/assetTransformer.js" 
    } 
  },
  "devDependencies": {
    "enzyme": "^3.8.0",
    "enzyme-adapter-react-16": "^1.7.1"
  }
}

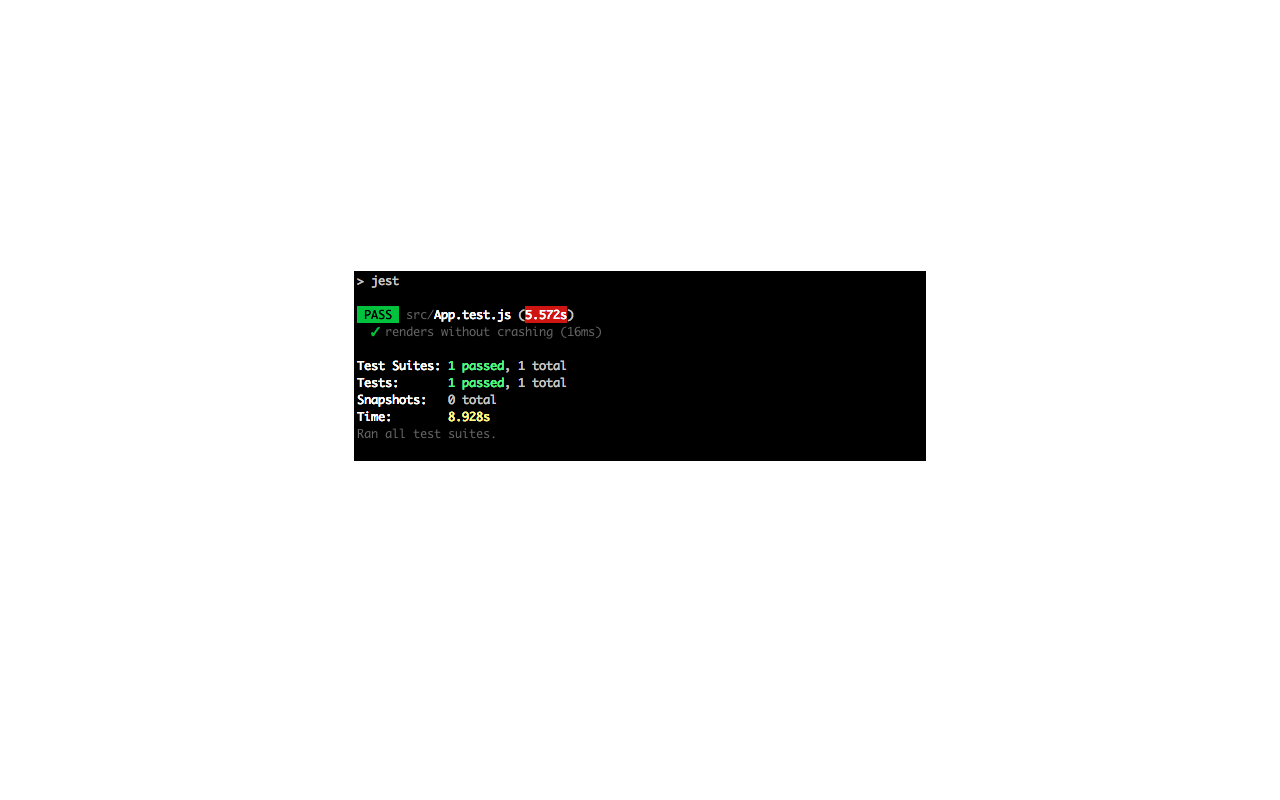
Here’s what we get from “npm test” this time:

Passing Jest + Enzyme test

Perfect!


Services: To mock or not to mock?

When testing an application at the integration level, there are at least 2 paradigms commonly used. Here we will briefly discuss:

  • End-to-End (e2e) testing on a Test environment
  • Isolated testing using mocked services

On an e2e testing environment, services are fully deployed and exist with the proper configuration necessary to talk to the app and/or services. This is what many testers may associate with when testing.

When working with an app using mocked services, this allows us to tailor the behavior we return to the consumer application. This is desirable due to 3rd party availability restrictions, API quotas, a non-stable service, or just lack of control and the negative effect this has on testing the app in an Integrated environment.

So then I should use mocks, right?

It depends! I prefer to use an actual service for running sanity checks and any automated functional tests. If you can create multiple testing environments, the one closest to the Production application should be configured with full non-mocked services. The reasoning is that you want to have as close a mirror to your application as possible with little-to-no gotchas.

If you are a developer of an app you may want to take the mocked services approach. With this, development is not compromised because of reasons out of your immediate control. Mocking services also allows you to better execute a wider array of paths between the app-service contract. Please note:Ā mocking can also be performed in unit tests themselves — and in many cases may negate the need for standing up mock services in your local environment.

Is that it?

Not really. Since there are minimal rules in creating software, you may encounter an environment which is used for e2e testing but with mocked services. I wouldn’t suggest thisĀ since you get less of a full picture which is provided when using a truly integrated e2e environment.