In many scenarios, it is desirable to create seeded data for an environment prior to usage. In this post, we will discuss how to initialize (running startup scripts) a NoSQL DB in different environments with seeded data, by the facilities provided in Spring Boot.
From Spring Initializr create a project with at least “Web” and “Cassandra” dependencies. Your pom.xml will look something like
<?xml version="1.0" encoding="UTF-8"?>
<project xmlns="http://maven.apache.org/POM/4.0.0" xmlns:xsi="http://www.w3.org/2001/XMLSchema-instance"
   xsi:schemaLocation="http://maven.apache.org/POM/4.0.0 http://maven.apache.org/xsd/maven-4.0.0.xsd">
   <modelVersion>4.0.0</modelVersion>
   <parent>
      <groupId>org.springframework.boot</groupId>
      <artifactId>spring-boot-starter-parent</artifactId>
      <version>2.1.1.RELEASE</version>
      <relativePath/> <!-- lookup parent from repository -->
   </parent>
   <groupId>com.blog</groupId>
   <artifactId>musicstore</artifactId>
   <version>0.0.1-SNAPSHOT</version>
   <name>musicstore</name>
   <description>Demo project for Spring Boot</description>

   <properties>
      <java.version>1.8</java.version>
   </properties>

   <dependencies>
      <dependency>
         <groupId>org.springframework.boot</groupId>
         <artifactId>spring-boot-starter-actuator</artifactId>
      </dependency>
      <dependency>
         <groupId>org.springframework.boot</groupId>
         <artifactId>spring-boot-starter-data-cassandra</artifactId>
      </dependency>
      <dependency>
         <groupId>org.springframework.boot</groupId>
         <artifactId>spring-boot-starter-web</artifactId>
      </dependency>

      <dependency>
         <groupId>org.springframework.boot</groupId>
         <artifactId>spring-boot-starter-test</artifactId>
         <scope>test</scope>
      </dependency>
   </dependencies>

   <build>
      <plugins>
         <plugin>
            <groupId>org.springframework.boot</groupId>
            <artifactId>spring-boot-maven-plugin</artifactId>
         </plugin>
      </plugins>
   </build>

</project>
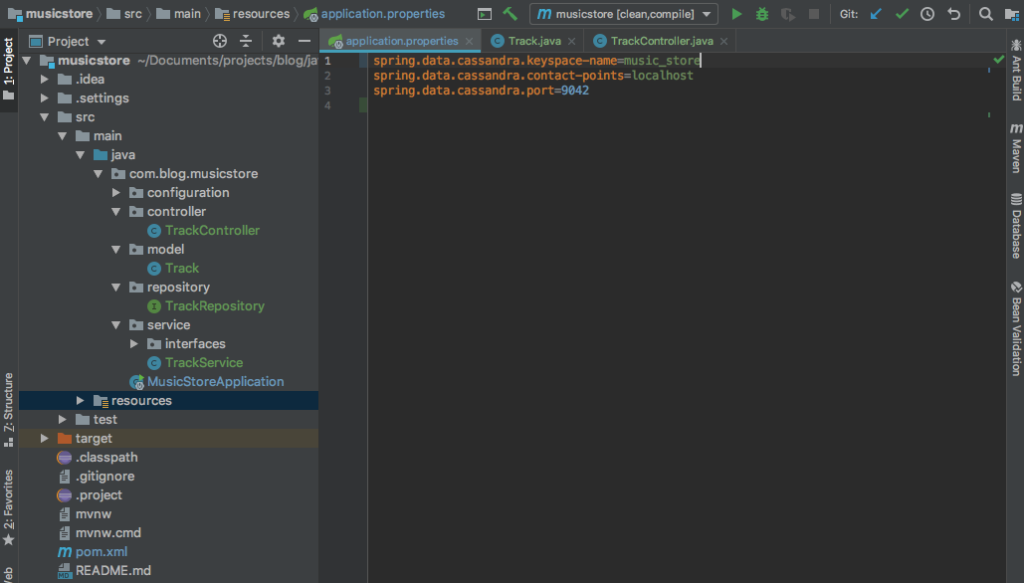
Once you have your project template, begin to create the web services, models, and configuration for the application. The project layout may look something like below:
Assuming your NoSQL database is up, you can test out the application by adding the Spring DB configuration in the application.properties file (see a full list here) and running the app. *Note* At this point there is no need for adding a configuration class and creating bean(s) for the NoSQL db — Spring boot uses the key-value pairs in the configuration to “auto” create the DB bean(s).
Here’s the output from running:
2019-01-23 19:15:58.816 ERROR 17905 --- [           main] o.s.boot.SpringApplication               : Application run failed

org.springframework.context.ApplicationContextException: Unable to start web server; nested exception is org.springframework.boot.web.server.WebServerException: Unable to start embedded Tomcat
....
....
Caused by: com.datastax.driver.core.exceptions.InvalidQueryException: Keyspace 'music_store' does not exist
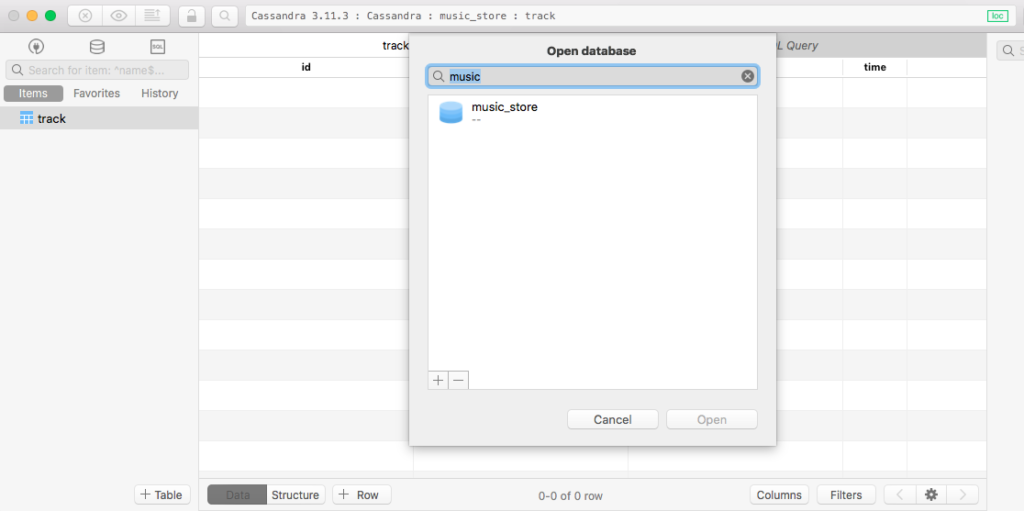
This exception is a Cassandra DB specific error relating to … the keyspace not existing! By default, our keyspace (think of this as our DB) can not be created using the convenient Spring Cassandra properties (in our application.properties). We will now need to create our Cassandra DB beans manually and tell it to create a keyspace if it does not exist.
That configuration file looks like this
package com.blog.musicstore.configuration;

import com.blog.musicstore.MusicStoreApplication;
import org.springframework.beans.factory.annotation.Value;
import org.springframework.context.annotation.Bean;
import org.springframework.context.annotation.Configuration;
import org.springframework.data.cassandra.config.AbstractCassandraConfiguration;
import org.springframework.data.cassandra.config.CassandraCqlClusterFactoryBean;
import org.springframework.data.cassandra.config.SchemaAction;
import org.springframework.data.cassandra.core.cql.keyspace.CreateKeyspaceSpecification;
import org.springframework.data.cassandra.core.cql.keyspace.KeyspaceOption;
import org.springframework.data.cassandra.repository.config.EnableCassandraRepositories;

import java.util.*;

@Configuration
@EnableCassandraRepositories(basePackages = "com.blog.musicstore")
public class DatabaseConfig extends AbstractCassandraConfiguration {

    @Value("${spring.data.cassandra.keyspace-name}")
    private String keyspaceName;

    @Value("${spring.data.cassandra.port}")
    private Integer port;

    @Value("${spring.data.cassandra.contact-points}")
    private String contactPoints;

    @Bean
    @Override
    public CassandraCqlClusterFactoryBean cluster() {
        CassandraCqlClusterFactoryBean bean = new CassandraCqlClusterFactoryBean();
        bean.setKeyspaceCreations(getKeyspaceCreations());
        bean.setContactPoints(contactPoints);
        bean.setPort(port);
        bean.setJmxReportingEnabled(false);
        return bean;
    }

    @Override
    protected String getKeyspaceName() {
        return keyspaceName;
    }

    @Override
    public String[] getEntityBasePackages() {
        return new String[]{MusicStoreApplication.class.getPackage().getName()};
    }

    @Override
    protected List<CreateKeyspaceSpecification> getKeyspaceCreations() {
        return Collections.singletonList(CreateKeyspaceSpecification.createKeyspace(getKeyspaceName())
                .ifNotExists()
                .with(KeyspaceOption.DURABLE_WRITES, true)
                .withSimpleReplication());
    }

    @Override
    public SchemaAction getSchemaAction() {
        return SchemaAction.CREATE_IF_NOT_EXISTS;
    }
}
Compiling and running the app again, we no longer see errors. The Keyspace was also created and so were the tables (Model repository classes should extend CassandraRepository and have @Repository annotation). That’s great!
Adding data for different environments
Spring uses Profiles to allow runtime differentiation of the same compiled bytecode. We will use it to perform specific db seeding prior to running the application. This can be used to ensure different environment(s) have different setup data prior (often for testing).
In Spring, it’s very easy. Just add a property file for each environment/profile.
application.properties
spring.data.cassandra.keyspace-name=music_store
spring.data.cassandra.contact-points=localhost
spring.data.cassandra.port=9042
application-dev.properties
spring.data.cassandra.keyspace-name=musicstore_dev
spring.data.cassandra.contact-points=localhost
spring.data.cassandra.port=9042
not.a.real.property.dev.specific.stuff=blah
application-qa.properties
spring.data.cassandra.keyspace-name=musicstore_qa
spring.data.cassandra.contact-points=localhost
spring.data.cassandra.port=9042
not.a.real.property.qa.specific.stuff=blah
Now when we run our application make sure to set the active profile to the correct target — Specify via env variable, JVM system properties, context param on web app (xml), etc.
-Dspring.profiles.active=dev
You should now see the new Keyspace set from the profile properties, created in Cassandra. But there is no data in it…
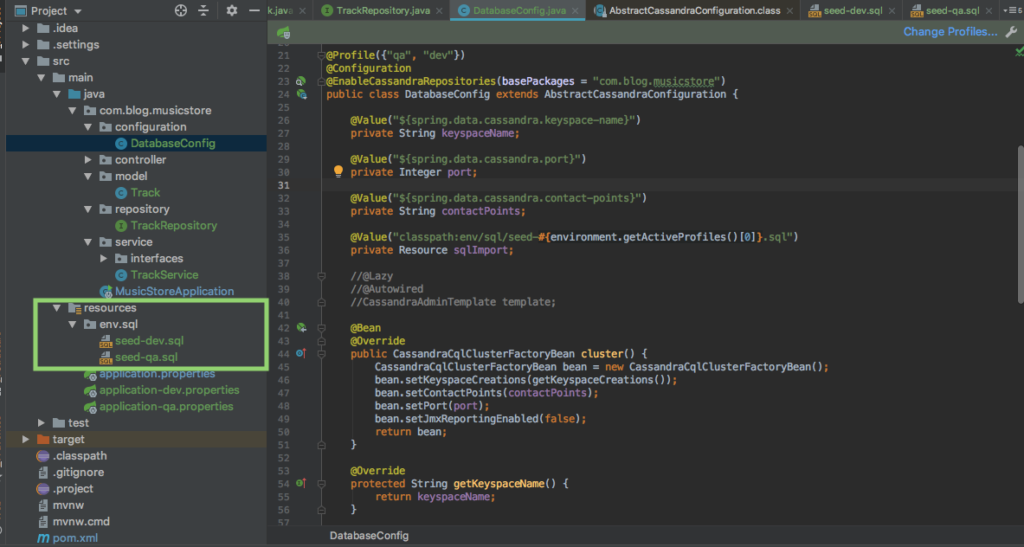
To add data in the DB, it would be nice if our there is a spring property to set in the properties file that specifies a script to run after keyspace creation. This capability is provided if using JPA or Hibernate. If we look into the “AbstractCassandraConfiguration” interface (used for creating our Database beans) there is a method specified for adding data and tearing down:
getStartupScripts
and
getShutdownScripts
respectively. So let’s set up a startup script to load our SQL for each env. (Note: It would be better to use an ORM library to interface with our DB, rather than using SQL or CQL).
DatabaseConfig.java
package com.blog.musicstore.configuration;

import com.blog.musicstore.MusicStoreApplication;
import io.micrometer.core.instrument.util.IOUtils;
import org.springframework.beans.factory.annotation.Value;
import org.springframework.context.annotation.Bean;
import org.springframework.context.annotation.Configuration;
import org.springframework.context.annotation.Profile;
import org.springframework.core.io.Resource;
import org.springframework.data.cassandra.config.AbstractCassandraConfiguration;
import org.springframework.data.cassandra.config.CassandraCqlClusterFactoryBean;
import org.springframework.data.cassandra.config.SchemaAction;
import org.springframework.data.cassandra.core.cql.keyspace.CreateKeyspaceSpecification;
import org.springframework.data.cassandra.core.cql.keyspace.KeyspaceOption;
import org.springframework.data.cassandra.repository.config.EnableCassandraRepositories;

import java.io.IOException;
import java.io.InputStream;
import java.util.*;

@Profile({"qa", "dev"})
@Configuration
@EnableCassandraRepositories(basePackages = "com.blog.musicstore")
public class DatabaseConfig extends AbstractCassandraConfiguration {

    @Value("${spring.data.cassandra.keyspace-name}")
    private String keyspaceName;

    @Value("${spring.data.cassandra.port}")
    private Integer port;

    @Value("${spring.data.cassandra.contact-points}")
    private String contactPoints;

    @Value("classpath:env/sql/seed-#{environment.getActiveProfiles()[0]}.sql")
    private Resource sqlImport;

    //@Lazy
    //@Autowired
    //CassandraAdminTemplate template;

    @Bean
    @Override
    public CassandraCqlClusterFactoryBean cluster() {
        CassandraCqlClusterFactoryBean bean = new CassandraCqlClusterFactoryBean();
        bean.setKeyspaceCreations(getKeyspaceCreations());
        bean.setContactPoints(contactPoints);
        bean.setPort(port);
        bean.setJmxReportingEnabled(false);
        return bean;
    }

    @Override
    protected String getKeyspaceName() {
        return keyspaceName;
    }

    @Override
    public String[] getEntityBasePackages() {
        return new String[]{MusicStoreApplication.class.getPackage().getName()};
    }

    @Override
    protected List<CreateKeyspaceSpecification> getKeyspaceCreations() {
        return Collections.singletonList(CreateKeyspaceSpecification.createKeyspace(getKeyspaceName())
                .ifNotExists()
                .with(KeyspaceOption.DURABLE_WRITES, true)
                .withSimpleReplication());
    }

    @Override
    protected List<String> getStartupScripts() {
        List<String> scripts = new ArrayList<>();

        try(InputStream is = sqlImport.getInputStream()) {
            String string =  IOUtils.toString(is);
            scripts = Arrays.asList(string.split(";"));
        } catch (IOException e) {
            e.printStackTrace();
        }
        /* Doesn't work
        // 1) no valid reference to cassandraTemplate (Not initialized)
        // 2) can't extract sql from DAO
        try {
            ProductOrder productOrder = new ProductOrder("1","2", "3", new Date());
            template.insert(productOrder);

        } catch (Exception e) {
            e.printStackTrace();
        }
        return new ArrayList<>();
        */

        return scripts;
    }

    @Override
    public SchemaAction getSchemaAction() {
        return SchemaAction.CREATE_IF_NOT_EXISTS;
    }
}
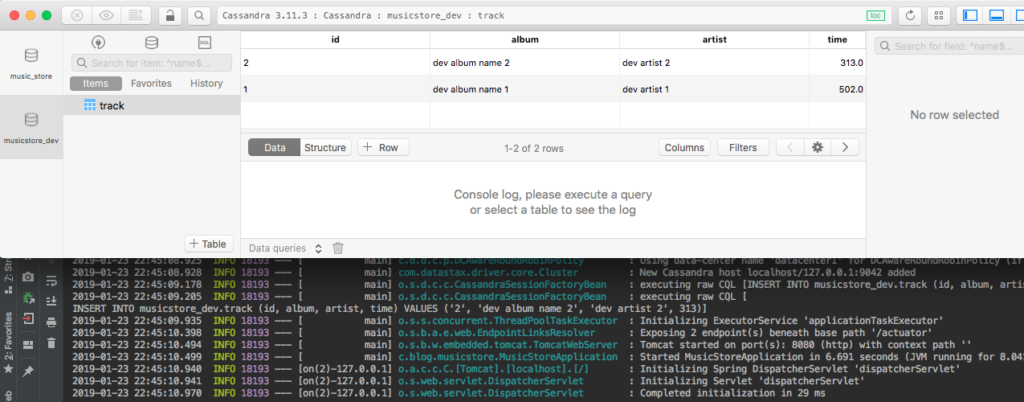
Now with, the updated config, we should see data in our environment created on execution of our application.
And there we have it, a seeded DB for our target environment/profile (Note: Don’t forget to also add scripts for shutdown of the application).

