
Automated email verification is something that can help streamline testing by circumventing the need for manual intervention. In cases where you have control of the email provider and recipient, it is possible to use an API to interface with this email account. This post will address how to perform do this email verification with Google Apps Script.
Conceptual Overview
What we want to do is access a target Gmail account and perform CRUD operations on the emails. But how?
- Google Apps Script will provide us with a public customizable API proxy to perform those CRUD operations.
- Our client consumer will interact with the deployed Google Apps Script API proxy, executing the correct HTTP method as well as the request parameters necessary to operate on the Gmail account. A response should be returned so that the client can identify the result of the operation.
Setup
- Create a new Gmail account that will be used with automation.
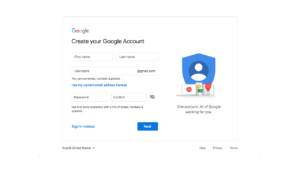
Create Google Account

Design
- Navigate to Google Apps Script and develop your application. For our purpose, we will simply need 1 post method that will take a JSON body in the parameters:
- emailCount — How many of the most recent emails to check
- subjectPattern — Regex pattern that the email subject should match against
- dateAfter — Dates after this will be included as emails to check (ISO 8601)
- timeout — How long in seconds should we wait to check the emails
The editor will provide you with auto-completion. See this page for the complete Apps Script Reference. In addition, you can enable more API’s using Resources > Advanced Google Services.
Keep in mind, this is YOUR API proxy around the facilities that Gmail provides, you can perform way more capabilities than what is seen here.
/**
/**
 * Process unread emails and return latest match (stringified json)
 * according to subject Regex after marking it as unread
 * Waits n Seconds until a non-empty response is returned
 *
 * {
 * emailCount = Integer
 * subjectPattern = "String.*That_is_regex.*"
 * dateAfter = Date.toISOString()
 * timeout = Integer (seconds)
 * }
 */
function doPost(e) {
  var json = JSON.parse(e.postData.contents);

  var emailCount = json.emailCount;
  var subjectPattern = json.subjectPattern;
  var dateAfter = json.dateAfter;
  var timeoutMs = json.timeout * 1000;

  var start = Date.now();
  var waitTime = 0;
  var responseOutput = {};

  while(Object.getOwnPropertyNames(responseOutput).length == 0 && waitTime <= timeoutMs ) {
    responseOutput = controller(emailCount, subjectPattern, dateAfter);
    waitTime = Date.now() - start;
  }

  return ContentService.createTextOutput(JSON.stringify(responseOutput));
}


function controller(emailCount, subjectPattern, dateAfter) {
  var responseOutput = {};

  for(var i = 0; i < emailCount; i++) { // Get the msg in the first thread of your inbox var message = GmailApp.getInboxThreads(i, i + 1)[0].getMessages()[0]; var msgSubject = message.getSubject(); var msgDate = message.getDate(); // Only check messages after specified Date & Subject match if(msgDate.toISOString() >= dateAfter) {
      if(msgSubject.search(subjectPattern) > -1) {
        if(message.isUnread()){
          GmailApp.markMessageRead(message);

          responseOutput = getEmailAsJson(message);
          break;
        }
      }
    }
  }

  return responseOutput;
}


function getEmailAsJson(message) {
  var response = {};

  response["id"] = message.getId();
  response["date"] = message.getDate();
  response["from"] = message.getFrom();
  response["to"] = message.getTo();
  response["isRead"] = !message.isUnread();
  response["subject"] = message.getSubject();
  response["body"] = message.getBody();
  response["plainBody"] = message.getPlainBody()

  return response;
}
When you are done, save your script.
Publish
- Deploy your script as a web app to act as a Proxy. You will need:
- Project version to deploy into (with commit comment)
- Who this app will execute as — Basic security
- Who has access to the app — More security

Deploy Script as Web App

After continuing, your app should be deployed to a public Google Apps Script URL, which you will access as your API Proxy. Copy the endpoint URL you will use it next.
Run
- Test it out! For this, I’ve accessed the web app endpoint with the following json body to find the 1st latest email after 05/20/2019 7:14:19 UTC
{
	"emailCount": 1,
	"subjectPattern": ".*",
	"dateAfter": "2019-05-20T07:14:19.194Z",
	"timeout": 5
}
As expected, the latest email was returned in a JSON request that also includes some metadata. It also marked the email as read, so subsequent requests will not reprocess it — all as specified in our script. Super!

Integrate
- With our client app, we may have something like this which works on our Google Apps Script
package com.olandre.test.email;

import io.restassured.RestAssured;
import io.restassured.response.Response;
import org.json.simple.JSONObject;
import org.openqa.selenium.*;

import java.util.HashMap;
import java.util.Map;
import java.util.regex.Matcher;
import java.util.regex.Pattern;

public class Email
{

    public static final String servicedGmailFullCapabilitiesEmail = "emailuser1@gmail.com"
    public static final String servicedGmailFullCapabilitiesService = "https://script.google.com/macros/s/FAKEGOOGLEAPPSSCRIPTURL/exec";

    public Email()
    {
    }

    public static String getCurrentMethodName()
    {
        return Thread.currentThread().getStackTrace()[2].getClassName() + "." + Thread.currentThread().getStackTrace()[2].getMethodName();
    }

    public String processNewMemberSignupEmail(String email, Integer timeout, String emailSearchPastDate, String firstName,
        String lastName) throws Exception{
        final String NEW_SIGNUP_SUBJECT = String.format( "Welcome %s %s!", firstName, lastName);
        final String SIGNUP_CONTINUE_LINK_REGEX = ".*=\"(http.*/signup/.*)\" target.*";
        final String PLAINTEXT_SIGNUP_TEXT = String.format(
            ".*(Hi, %s! Welcome Aboard .*To sign up, you'll need to create a password.*html.*/register/).*", firstName);

        Request request = new Request();
        Response response = request.checkEmail( email, NEW_SIGNUP_SUBJECT, emailSearchPastDate, timeout );
        return request.findEmailClickthroughLink(
            response, SIGNUP_CONTINUE_LINK_REGEX, PLAINTEXT_SIGNUP_TEXT );
    }

    /**
     * When we decide to add headers, and other metadata
     * to the request, outsource and turn into a generated builder Class
     */
    public class Request {

        private Map<String, String> emails;

        Request() {
            emails = new HashMap<>(  );
            emails.put(servicedGmailFullCapabilitiesEmail, servicedGmailFullCapabilitiesService);
        }

        public Response post(String url, JSONObject body) {
            Response preRedirectResponse = RestAssured.given()
                                                      .redirects().follow( false )
                                                      .body( body.toString() )
                                                      .when().post( url );

            String location = preRedirectResponse.getHeader( "Location" );

            return RestAssured.given()
                              .cookies(preRedirectResponse.getCookies())
                              .when().get(location)
                              .thenReturn();
        }

        /**
         * {
         *   emailCount = Integer
         *   subjectPattern = "String.*That_is_regex.*"
         *   dateAfter = (ISO 8601 Date"2018-05-10T17:24:58.000Z")
         *   timeout = Integer (seconds)
         * }
         * @param
         * @return Response
         */
        public Response checkEmail(String email, String subjectPattern, String emailSearchPastDate, Integer timeout) throws Exception {
            String serviceURL = emails.get( email );

            HashMap<String, Object> model = new HashMap<>(  );
            model.put( "emailCount", 10 );
            model.put( "subjectPattern", subjectPattern );
            model.put( "dateAfter", emailSearchPastDate );
            model.put( "timeout", timeout * 1000);

            JSONObject json = new JSONObject(model);

            Response response = null;
            if (serviceURL != null) {
                response = post( serviceURL, json );
                if(response.getBody().asString().equals( "{}" )) {
                    LOGGER.warn( "[ FAIL ] Did not find response data using request: " +
                                       json .toJSONString(), getCurrentMethodName());
                }
            } else {
                LOGGER.error( " [ FAIL ] Couldn't find the service url for account " +
                                   email, getCurrentMethodName() );
            }
            return response;
        }

        public String findEmailClickthroughLink(Response response, String htmlPatternToParse, String plaintextPatternToParse) throws Exception {
            String body = response.getBody().asString();
            findTextInEmail(body, plaintextPatternToParse, "PLAINTEXT");
            return findTextInEmail( body, htmlPatternToParse, "HTML" );
        }

        private String findTextInEmail(String sourceText, String regex, String emailType ) throws Exception{
            String targetText = "";

            Pattern pattern =  Pattern.compile( regex );
            Matcher matcher = pattern.matcher( sourceText.replace("\\", "") );
            if(matcher.matches()) {
                targetText = matcher.group(1)
                                    .replace("=", "=");
                LOGGER.info( " [ PASS ] Found a link from " + emailType + " email " +
                                   targetText, getCurrentMethodName() );
            }
            return targetText;
        }
    }
}
In the future you may modify your Google Apps Script by publishing a new version (or overwriting the existing one). Depending on the change, this modified “contract” of your proxy may also need to be updated correspondingly with the client application. With this in mind, you now have the power to use Google Apps Script to verify emails.
NOTE: In case you need extra configuration around security, you can take the more configurable approach by using the Gmail API directly.


